A cashier in a sari-sari store scans or types one item after another all day. A barista taps the same ten drinks over and over. A hardware store clerk searches through thousands of part numbers. These are very different jobs, and one cashier screen can't be perfect for all of them.
That's why HuggsPOS has five POS layouts. Same system, same reports and inventory, but a different selling screen depending on how your store works. You can switch at any time.
The five layouts at a glance
| Layout | How it works | Best for |
|---|---|---|
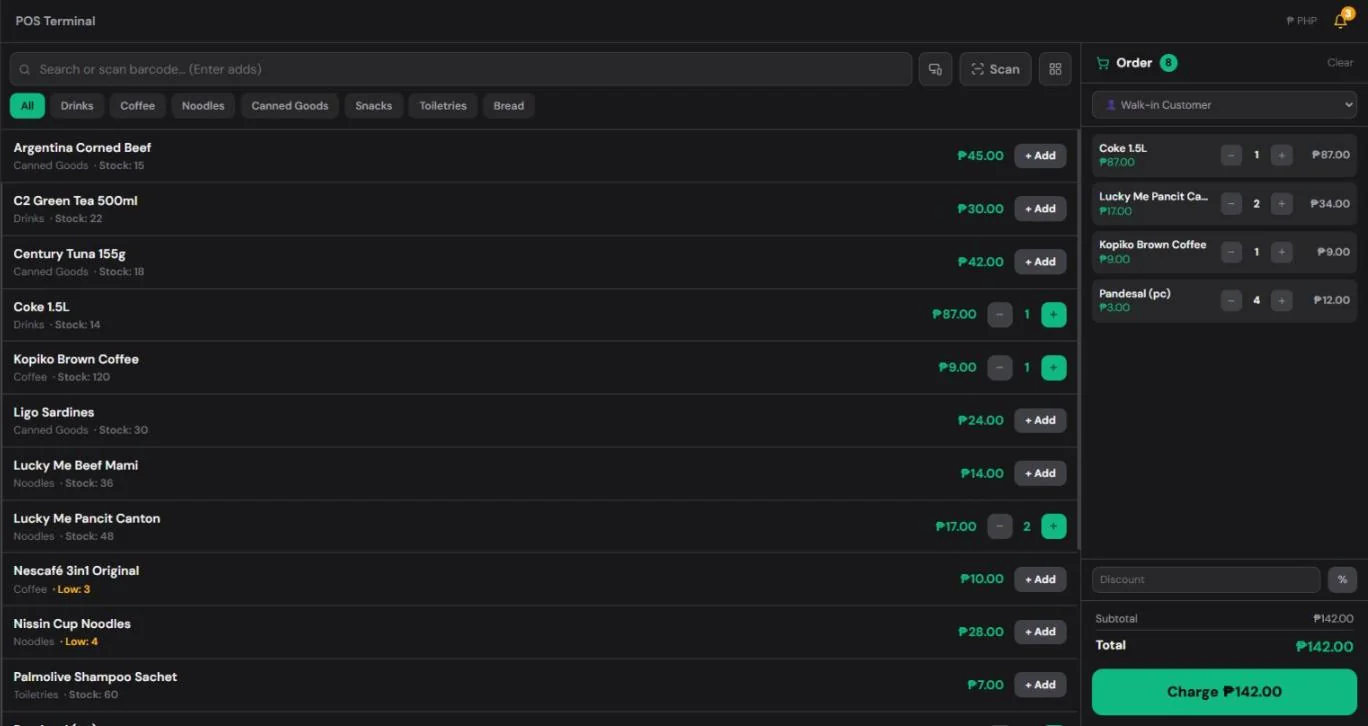
| Classic list | Fast one-line rows, scanner-first | Sari-sari stores, groceries, variety stores |
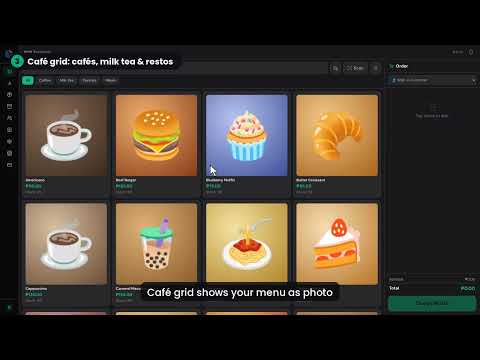
| Café grid | Photo tiles sorted by category | Cafés, milk tea shops, bakeries, restos |
| Big-button kiosk | Huge colourful buttons, no keyboard needed | Tablets, canteens, carinderias, food stalls |
| Compact pro | Dense table with SKU/barcode and keyboard shortcuts | Hardware stores, pharmacies, auto parts, wholesale |
| Classic register | Old-school cashier screen with a big total and function keys | Long-time cashiers, groceries, minimarts |
Classic list: built for speed
Scan a barcode or search by name, and each item drops into the order on its own line. There are no pictures to scroll through, just a quick list. This is the best fit for stores with many small items and a barcode scanner, like a typical sari-sari store or neighborhood grocery.
Café grid: your menu as photo tiles
Items appear as tiles with photos, grouped by category. Tap a milk tea, a coffee and a pastry, and the order is done. It works best when you sell a short menu of items that customers order by name, not by barcode, and when you've added photos of your items.
Big-button kiosk: no keyboard needed
Huge, colourful buttons fill the screen. It's made for touchscreens: a tablet on the counter of a canteen, a carinderia or a food stall, where the cashier taps fast and rarely types anything.
Compact pro: for stores with lots of items
A dense table shows each item's SKU or barcode, name, price and stock, with keyboard shortcuts for moving through the list. If you have hundreds or thousands of items and staff who search by code, like in a hardware store, a pharmacy or an auto parts shop, this layout fits more on the screen and keeps hands on the keyboard.
Classic register: the old-school cashier screen
A big total display, numbered lines and function keys, like the cash registers many cashiers learned on. Scan, press F10, and the sale is paid. It's a good choice when your cashiers are fast with a keyboard and scanner and don't want to touch a mouse.
How to choose
Ask three questions:
- Do you scan barcodes or tap items? Scanning points to Classic list, Compact pro or Classic register. Tapping points to Café grid or Big-button kiosk.
- How many items do you sell? A short menu fits a grid. A long list of products fits a list or a table.
- What device is at the counter? Touchscreens and tablets suit the grid and kiosk. A computer with a keyboard and scanner suits the list, pro table and register.
Not sure? Try one for a day, then switch. Nothing is lost when you change layouts: your items, sales and reports stay the same.
How to change the layout
- Open Settings → Store look & layout.
- Each card shows what that layout looks like. Pick one.
- Tap Save. The POS screen switches right away.
Different counters, different layouts
If you run more than one counter, each terminal can have its own layout. For example, the front counter can use Classic register with a scanner, while a tablet for quick orders uses Big-button kiosk. Set this in Settings → Terminals by choosing a POS layout for each terminal.